
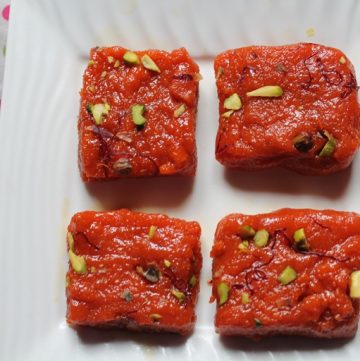
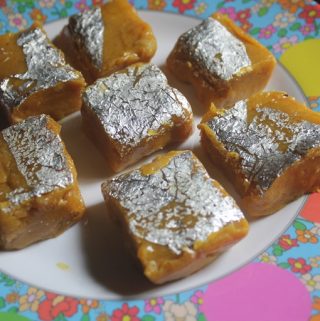
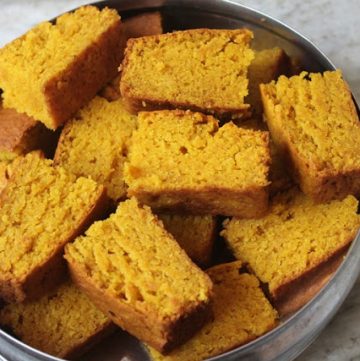
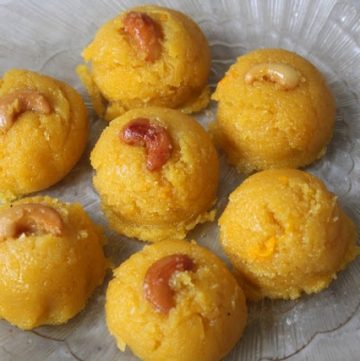
Mango Burfi is a simple yet rich Indian sweet made with ripe mango puree, milk powder, ghee, and sugar. It’s a quick, stovetop dessert that turns out soft, slightly fudgy, and full of mango flavour. Think of it like a fruity twist on the traditional milk burfi, but brighter, fresher, and perfect for the summer season.
If you’ve got mangoes lying around and don’t want to make the usual shakes or aamras, this is a fun and creative way to use them. It's also a nice option for festivals or small celebrations when you want something sweet, but don’t want to spend hours in the kitchen.
Mango Burfi Recipe
Mango Burfi Recipe - Easy Mango Barfi Recipe with step wise pictures. Super delicious mango burfi which taste so delicious. This is easy to make and perfect for any occasion. You can make this burfi on this beautiful mango season and enjoy.
Jump to:
About Mango Burfi
This recipe came to me during one mango season when we had too many ripe mangoes at once, more than we could eat. I’d already made mango lassi, mango rice, and even tried mango salsa. But I was craving something traditional and sweet, something that reminded me of homemade sweets from childhood. That’s when I stumbled upon mango burfi. The first time I tried it, I was honestly surprised at how easy it was. No khoya, no condensed milk, just simple pantry ingredients and the result was so good, I ended up making another batch the next day.
Why Mango Burfi is my Favorite - There’s something really comforting about this mango burfi recipe. I like it because it’s quick, fuss-free, and always turns out great, even on the first try. It doesn’t need any fancy ingredients or equipment. Just a few basics like milk powder, mango, and ghee — things I often already have at home. And the best part? It comes together in about 30 minutes. I also love how naturally flavourful it is. The mango brings in all the taste, no artificial flavourings or essence needed. Plus, it’s easy to customize. Sometimes I add cardamom, sometimes nuts, or skip the food colour, it always works.
It reminds me of when my mom used to make milk powder burfi and coconut barfi in the summer. She’d cut them into perfect squares and wrap a few in butter paper for later. The mango version takes me right back, only this one feels a bit more fun and summery.
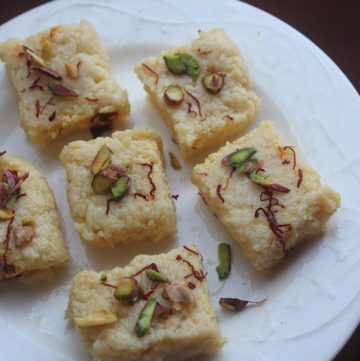
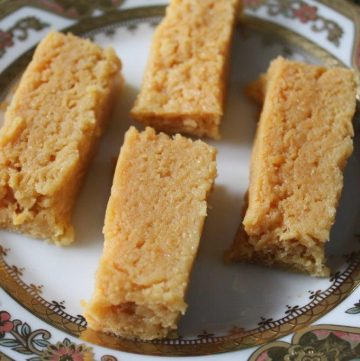
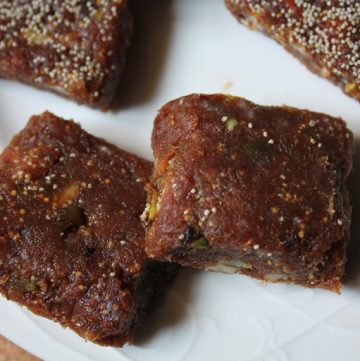
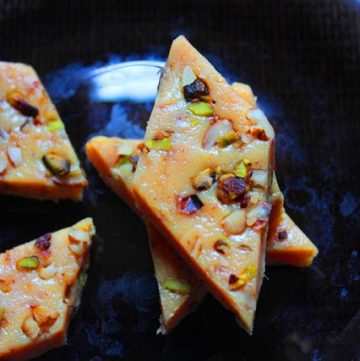
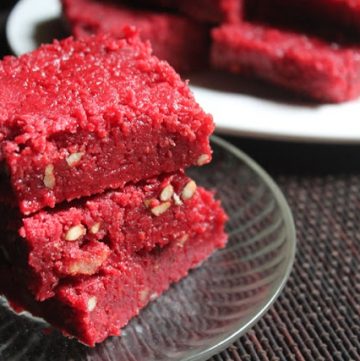
Similar Burfi Recipes
Mysorepak
Kalakand
Coconut Burfi
Anjeer Barfi
Khoya Burfi
Why This Recipe Works
This Mango Burfi recipe is one of those feel good recipes that’s simple, quick, and incredibly satisfying. It takes around 30 minutes from start to finish, which makes it perfect even if you’re short on time or energy. You don’t need any fancy tools or complicated techniques, just a pan, a spatula, and some basic ingredients.
The ingredient list is pretty minimal too. Most of the time, you’ll already have milk powder, sugar, and ghee in your kitchen. During mango season, fresh mango puree adds that lovely natural flavor and color, so no need for any artificial essence. Even if it's not mango season, canned mango puree works just fine!
What really makes this burfi special is the way mango and milk powder come together. They create this soft, melt-in-mouth texture that sets beautifully once cooled. And it holds its shape so well that slicing into neat squares or diamonds is super easy. Plus, it tastes as good as it looks sweet, rich, and fruity, all in one bite.
It’s also the kind of sweet that feels a little special but isn’t hard to make. Whether you’re sharing it or just enjoying it with chai in the evening, it gives that happy, homemade feeling every time.
Ingredients
Ghee – This is what gives the burfi that soft, rich texture and beautiful shine. It also keeps the mixture from sticking to the pan and also that nostalgic aroma takes me back to my childhood when my grandma used to make sweets.
Milk Powder – This acts as the base, think of it like the "body" of the burfi. It gives structure, creaminess, and that classic burfi bite. When you cook it slowly in ghee, it almost turns into a condensed milk-like texture. Just make sure to stir well so it doesn’t clump up.
Mango Puree – This is where the flavour really shines. I love using ripe Alphonso or Banganapalli mangoes, they’re naturally sweet and have a deep colour. If you’re using fresh ones, peel and blend the pulp without adding any water. If not in season, canned mango puree works too, just try to get an unsweetened one.
Sugar – The sweetness really depends on how sweet your mangoes are. I usually start with 1⁄2 cup and give it a quick taste once it starts heating, you can always add a bit more if needed. I like keeping it just sweet enough, not overly sugary.
Food Colour (optional): A few drops of yellow or orange food colour can make the burfi look extra bright and festive, but honestly, if your mangoes are naturally vibrant, you can totally skip this. I sometimes add it only when making for guests or during festivals.
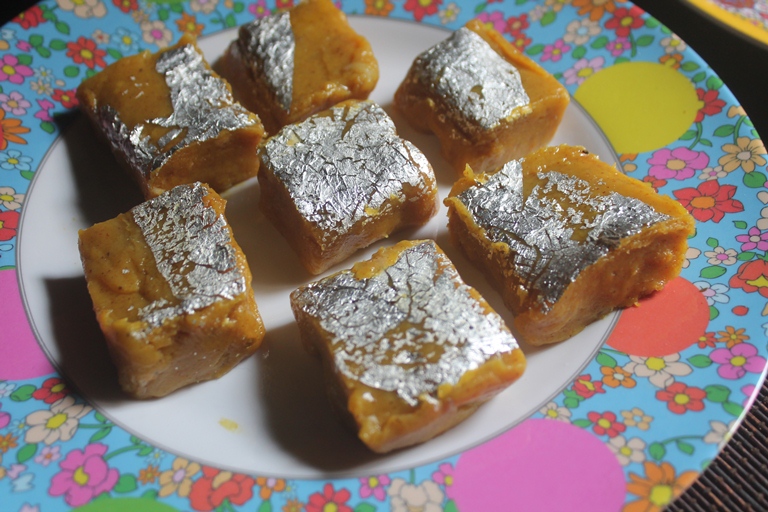
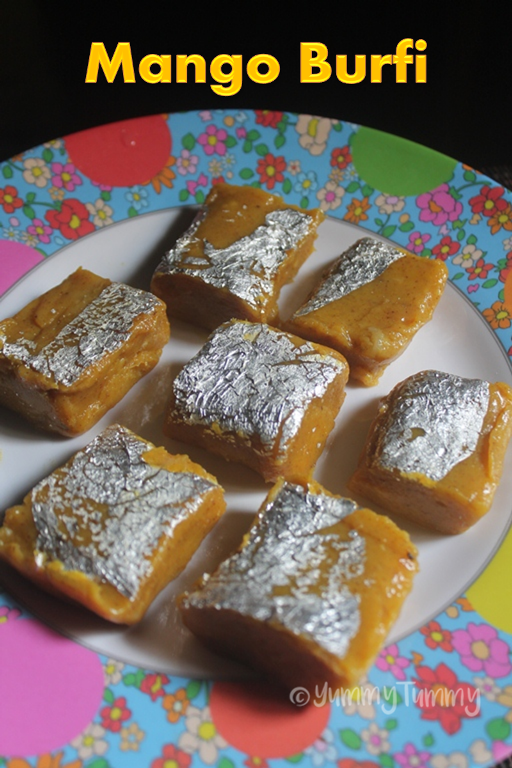
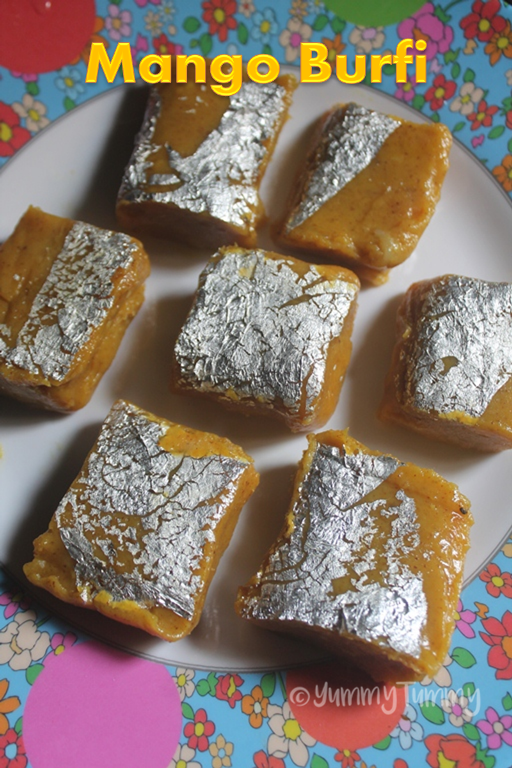
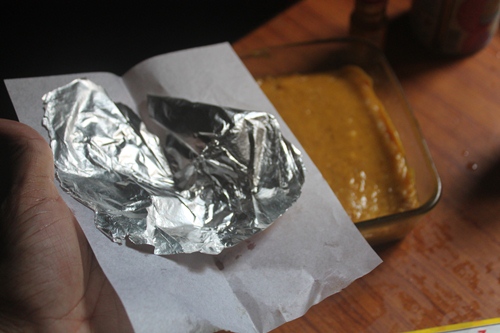
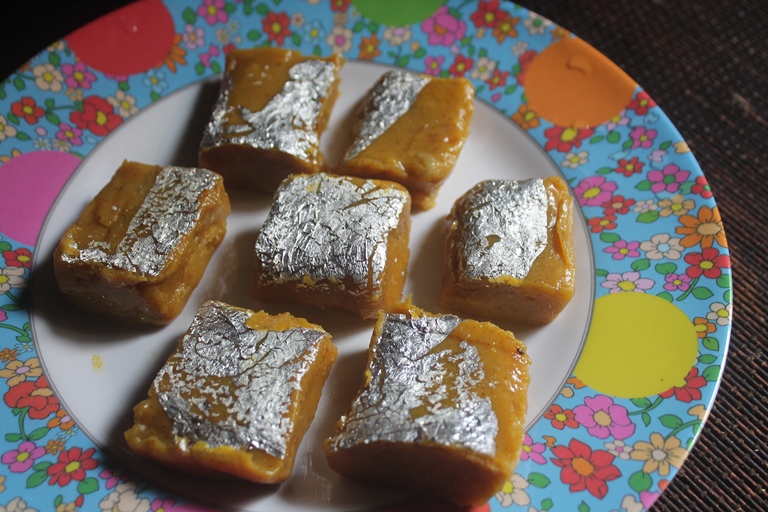
Silver Paper (optional): That shiny varak is more of a traditional touch. It looks really pretty and makes the burfi look fancy if you’re serving it at a celebration or gifting it to someone. But it’s not a must, chopped pistachios or even dried rose petals work well too.
Hacks
– Out of fresh mangoes? No problem, use canned mango puree instead. Just make sure to go for the unsweetened one, so the sweetness doesn’t go overboard when you add sugar.
– Silver leaf (varak) gives the burfi that classic festive touch, but honestly, it's totally optional. If you don’t have it, just sprinkle some chopped pistachios or even grated coconut on top. It adds a nice look and crunch.
– If your mangoes are fibrous, try sieving the mango puree before using. This gives the final burfi a much smoother and more polished texture.
– Food colour is optional too. If your mango puree is already a deep golden-yellow, you can completely skip it. But if you want that bright mango look, a few drops of yellow or orange food colour can help.
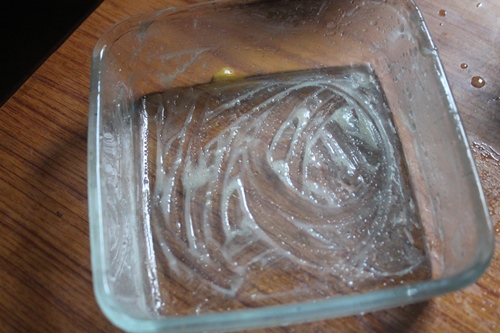
– Don’t forget to grease your tray generously with ghee or line it with parchment paper. It makes removing and cutting the burfi much easier and mess-free.
Mango Burfi (Step by Step Pictures)
1)Grease a pan with some ghee and set aside.
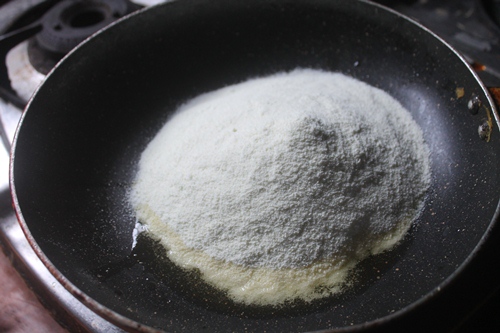
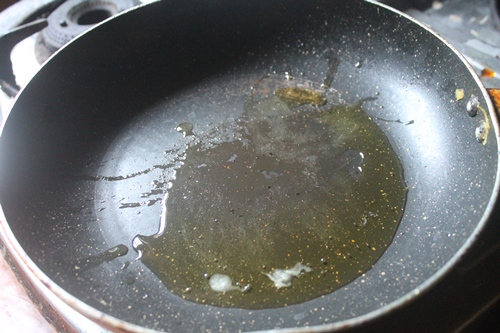
2)Heat ghee in a pan
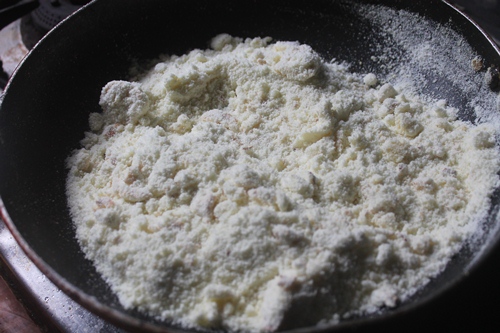
3)Add in milk powder
4)Stir fry for 2 mins.
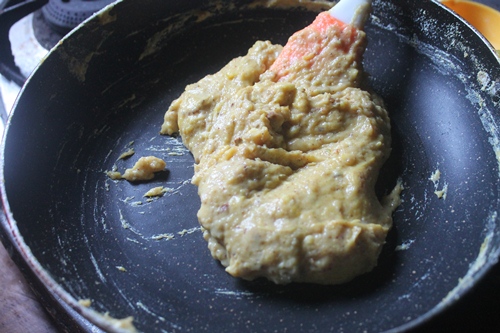
5)Add in mango puree
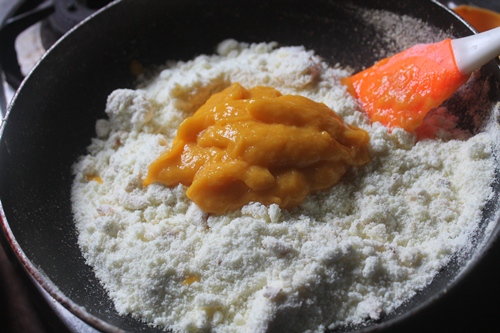
6)Mix well
7)Add in sugar
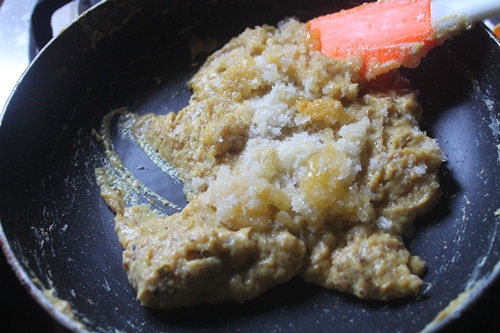
8)Mix well
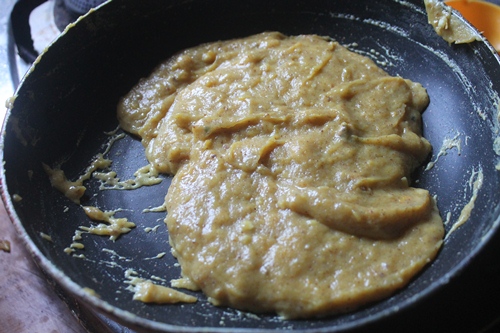
9)Now keep cooking till it thickens
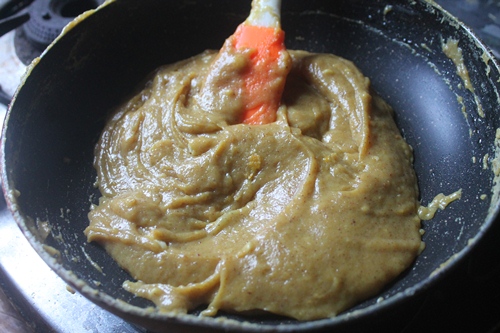
10)Add in few drops of food colour
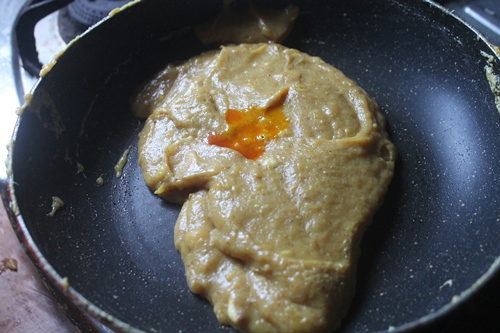
11)Mix well

12)Spoon it into the greased pan
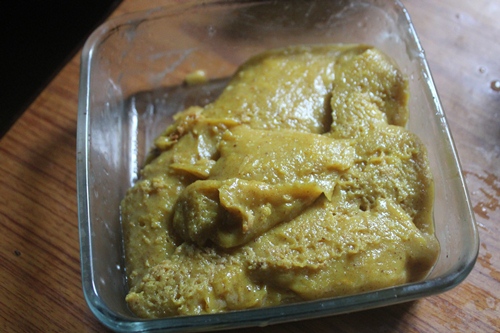
13)Spread evenly.
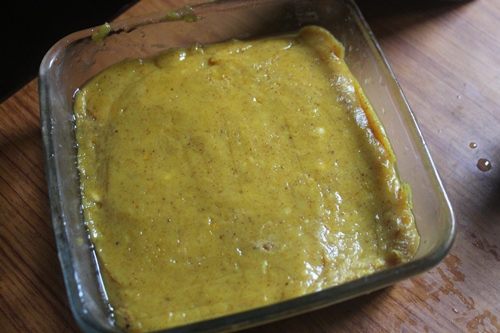
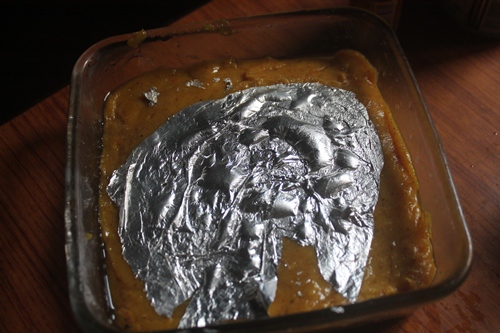
14)Place a sheet of silver leaf on top
15)Now it is done. Leave it to set.
16)Slice and serve
Expert Tips
– Don’t overcook the mix: As soon as the mixture thickens and starts leaving the sides of the pan, turn off the heat. Cooking it too long can make the burfi turn hard or dry. You want it soft and chewy, not crumbly.
– Keep stirring: Once you add sugar, things can stick to the bottom quickly. Stir the mixture constantly so it doesn’t burn or form lumps.
– Grease the knife before cutting: This small trick really helps! Just apply a bit of ghee on your knife before slicing, it makes cutting clean and smooth.
Storage
You can keep the mango burfi at room temperature for up to 2 days in a clean, airtight
container. For longer storage, place it in the refrigerator, it stays good for about a week. If it’s been in the fridge, take it out and let it sit at room temp for 5–10 minutes before serving. That way, the texture softens and tastes better.
Serving Ideas
- This burfi is a nice little sweet treat after lunch or dinner.
- It also pairs really well with masala chai or even chilled saffron milk.
- If you’re making a traditional Indian meal or a mini thali, this makes a great homemade dessert on the side.
- During festivals, you can serve it in mini paper cups or wrap it as part of a sweet box for gifting.
FAQ
Q: Is food colour really needed?
A: Not at all. If your mango puree is already bright and golden, you can skip it. It's just for appearance and doesn't affect the taste.
Q: Can I use condensed milk instead of milk powder?
A: Not for this recipe. Condensed milk has more moisture and sweetness, so it would need a different method altogether. Stick to milk powder for this version.
Fun Variations
Cardamom-Infused Mango Burfi - If you enjoy traditional Indian flavors, just add a pinch of cardamom powder while adding the sugar. It gives a soft, warm fragrance and adds that familiar, festive taste. You don’t need much even 1⁄4 teaspoon is enough to make a difference.
Nutty Mango Burfi - Love a bit of crunch? Stir in some chopped nuts like cashews, almonds, or pistachios into the mixture before it sets. Or, you can just sprinkle them on top once you pour the mix into the tray. The nuts not only add texture but also make the burfi look more festive.
Saffron Mango Burfi - To make it a little more aromatic, soak a few saffron strands in warm milk and add them along with the mango puree. It gives the burfi a deeper yellow colour and a light saffron aroma. This version feels a bit fancier, especially for special occasions.
More Burfi Recipes
📖 Recipe Card
Mango Burfi Recipe (Mango Barfi)
Equipment
- Cooking pot
Ingredients
- ¼ cup Ghee
- 2 cups Milk Powder
- ½ cup Mango Puree
- ½ cup Sugar or to taste
- ⅛ tsp Food Colour
- Edible Silver Paper (varak)
Instructions
- Pre-Prep (5–10 minutes) - First, I start by greasing a small tray or plate with a bit of ghee and setting it aside. You’ll be pouring the mixture into this, so it’s good to have it ready. If you’re using fresh mangoes, this is the time to peel, chop, and blend them into a smooth puree, no need to add water while blending. I also like to measure out all the ingredients beforehand so once the cooking starts, I don’t have to scramble.
- Making the Mixture (10–12 minutes) - In a heavy-bottomed or non-stick pan, I heat 1⁄4 cup of ghee on low flame. Once warm, I add in 2 cups of milk powder and stir it gently for a minute or two. This helps toast the powder slightly and removes any raw taste. Then, I pour in 1⁄2 cup of mango puree and stir everything together until it forms a thick, smooth mix. Next comes the sugar. I start with 1⁄2 cup and taste as I go (just carefully). If your mangoes are already sweet, this is often enough. Keep the flame low and stir constantly. You’ll see the mixture slowly starting to bubble and thicken. It’ll begin to pull away from the sides of the pan as it cooks.
- Thickening and Setting (5–10 minutes) - Once the mix looks thicker and more dough-like, it should be soft but not runny. I add a few drops of food colour (if using) and give it one last mix. At this stage, it should come together easily and not stick to your spatula. That’s how you know it’s ready to be set. I then transfer the hot mixture into the greased tray and spread it out evenly with the back of a greased spoon or spatula. If you want to use silver leaf, place it on top while it’s still warm. You can also sprinkle chopped nuts here if you like a bit of crunch.
Notes
Storage
You can keep the mango burfi at room temperature for up to 2 days in a clean, airtightcontainer. For longer storage, place it in the refrigerator, it stays good for about a week. If it’s been in the fridge, take it out and let it sit at room temp for 5–10 minutes before serving. That way, the texture softens and tastes better.
Serving Ideas
- This burfi is a nice little sweet treat after lunch or dinner.
- It also pairs really well with masala chai or even chilled saffron milk.
- If you’re making a traditional Indian meal or a mini thali, this makes a great homemade dessert on the side.
- During festivals, you can serve it in mini paper cups or wrap it as part of a sweet box for gifting.
Nutrition
If you have any questions not covered in this post and if you need help, leave me a comment or mail me @[email protected] and I’ll help as soon as I can.
Follow me on Instagram, Facebook,Pinterest ,Youtube for more Yummy Tummy inspiration.
IF YOU MAKE THIS RECIPE OR ANYTHING FROM YUMMY TUMMY, MAKE SURE TO POST IT AND TAG ME SO I CAN SEE ALL OF YOUR CREATIONS!! #YUMMYTUMMYAARTHI AND @YUMMYTUMMYAARTHI ON INSTAGRAM!
Sagar akhare
There are good recipee of mango burfi. Sweet in test. Please send me a mango burfi research paper.